Rubber lining’s effectiveness isn’t just about the material itself; it’s about the way it’s applied to ensure it lasts. At US RUBBER, our rubber lining procedure is designed to deliver maximum durability and performance through a carefully controlled, step-by-step process.
A properly executed rubber lining procedure ensures long-term protection, especially when paired with thorough rubber lining inspection and quality-controlled rubber lining installation practices.
How Our Rubber Lining Procedure Works
From surface preparation and material selection to rubber lining installation, curing, and rubber lining inspection, every stage of our rubber lining procedure is executed with precision.
Our focus on safety, environmental controls, and rigorous quality standards ensures each rubber lining procedure meets the highest benchmarks for long-term reliability.
Step 1: Surface Preparation
The first step in a successful rubber lining procedure is to prepare the surface. All substrates must be free of dirt, grease, mill scale, rust, and old coatings to ensure proper adhesion during rubber lining installation.
Depending on the project, this may involve abrasive blasting, grinding, and/or chemical cleaning. Proper preparation is critical, as it directly impacts the success of the rubber lining procedure and the results of the final rubber lining inspection.
During surface preparation, it’s important to maintain a clean, dust-free environment. Any contaminants that settle on the substrate can negatively affect bonding and overall performance.
Step 2: Material Selection
Not all rubber linings are the same, and selecting the right material is a critical part of the rubber lining procedure. Different environments require different compounds to ensure durability and performance throughout the rubber lining installation process.
Material choice usually depends on these factors:
- Chemical resistance: Protection against acids, alkalis, or solvents
- Temperature tolerance: Ability to withstand thermal cycling
- Abrasion resistance: Durability in slurry or high-friction environments
- Flexibility: Adaptability to complex geometries or movement
- Service life expectations: Matching compound properties to long-term performance needs
Our team evaluates each project individually, selecting materials that align with the specific requirements of the rubber lining procedure. This ensures optimal performance during operation and long-term reliability following rubber lining inspection.
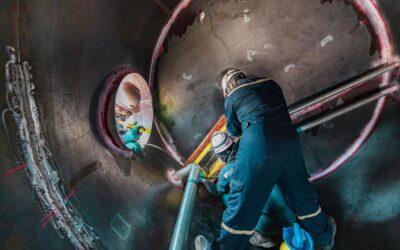
Step 3: Application of the Rubber Lining
With the substrate prepared and materials selected, the next phase of the rubber lining procedure is the rubber lining installation itself.
Depending on project requirements, linings may be hand-applied, sheet-applied, or formed to fit complex geometries. During this stage, technicians ensure the rubber is properly positioned, bonded, and rolled to eliminate air pockets.
Precision during this part of the rubber lining procedure is critical. Any inconsistencies can impact adhesion and performance, which will later be identified during rubber lining inspection.
Working with experienced rubber lining specialists ensures that application is handled correctly and meets strict industry standards.
Step 4: Curing the Rubber Lining
After application, curing is a key step in the rubber lining procedure. This phase activates the rubber’s chemical properties and ensures full bonding to the substrate following rubber lining installation.
Curing can be performed using steam, autoclave systems, or other controlled heating methods. Time and temperature must be carefully monitored to ensure the success of the rubber lining procedure and to prepare the lining for final rubber lining inspection.
At US RUBBER, we prioritize quality throughout every rubber lining procedure, ensuring curing is completed properly to maximize durability and performance.
Step 5: Inspection and Testing
No rubber lining procedure is complete without a thorough rubber lining inspection. After curing, the lining undergoes multiple tests to verify adhesion, thickness, and integrity.
This step ensures that the rubber lining installation meets performance standards and is ready for service. Any issues identified during rubber lining inspection are addressed before the system is returned to operation.
Here are some common inspection and testing methods.
| Test Method | Purpose | When Used |
| Spark Testing | Detects pinholes or weak spots | Post-curing, before service |
| Ultrasonic Testing | Measures lining thickness | During final inspection |
| Visual Examination | Ensures uniform coverage and integrity | Throughout entire installation |
| Adhesion Testing | Confirms bond strength to substrate | Final quality verification |
These tests verify that the lining meets performance requirements and will deliver long-term protection. Only after passing all inspections is equipment cleared for service.
Safety and Quality at Every Stage
Throughout each phase of the rubber lining procedure, safety and quality remain top priorities. Environmental controls protect both workers and the lining system, while consistent rubber lining inspection ensures reliable performance.
By following best practices and maintaining strict quality control during rubber lining installation, we deliver solutions that minimize downtime and extend asset life.
Get Expert Rubber Lining Installation From US RUBBER
A successful rubber lining procedure depends on precision, planning, and expertise. At US RUBBER, our team delivers high-quality rubber lining installation backed by thorough rubber lining inspection and proven processes.
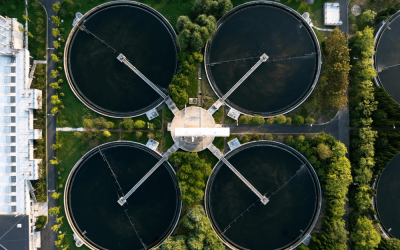
If your facility requires tank, vessel, or piping protection, trust experienced rubber lining experts to handle your next project.
Contact our team to learn more about our rubber lining services and how we can help extend the lifespan of your equipment.